


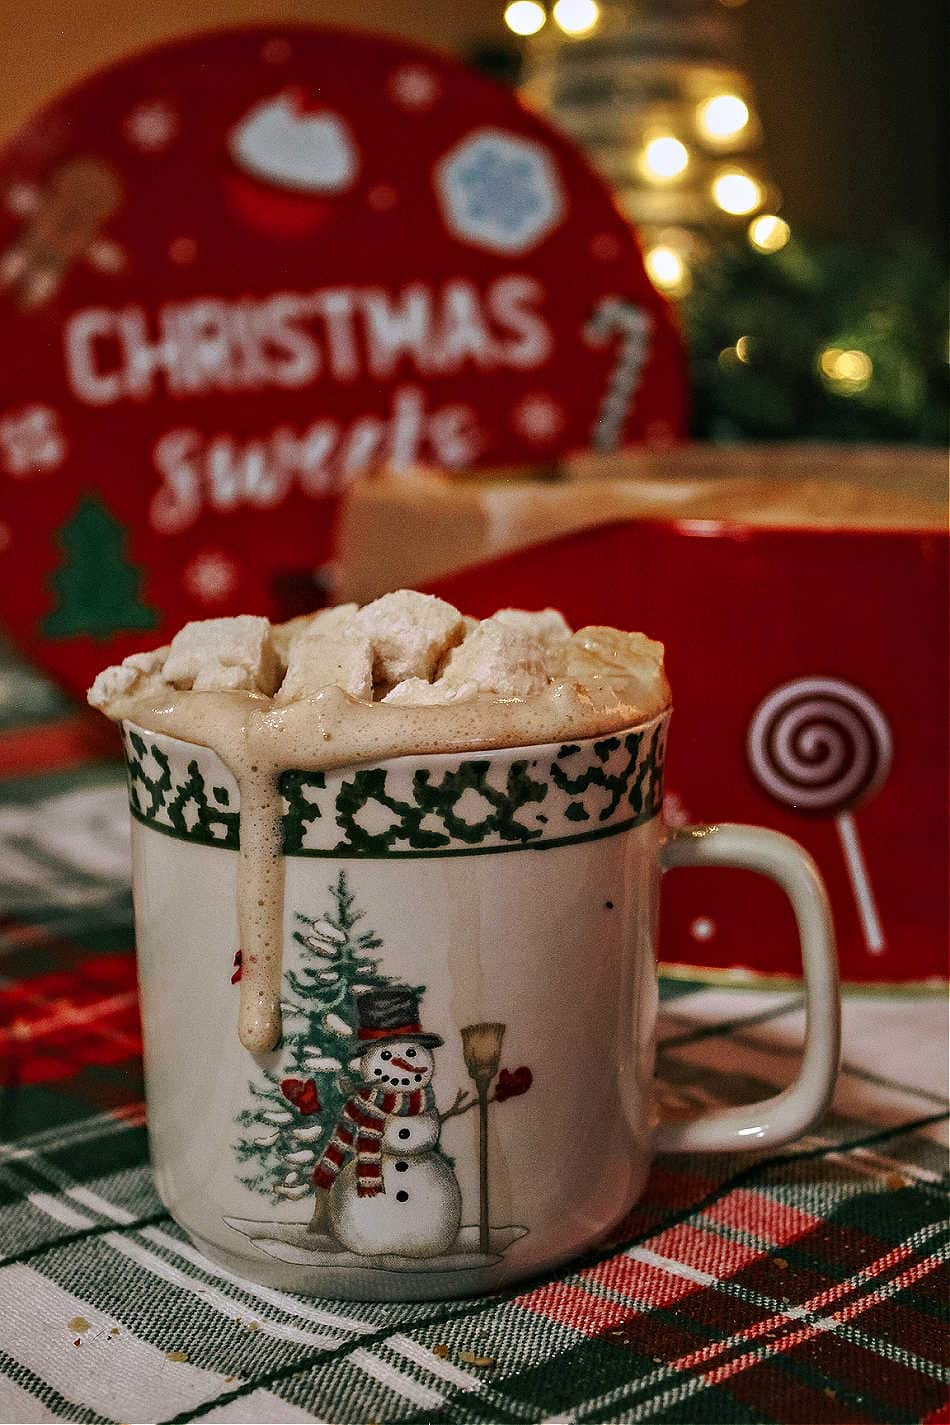
Homemade marshmallows have always intimidated me, but like many things that seem complicated, they’re quite easy to make and only take a bit more time. Today, I’m sharing a recipe for easy, delicious, and healthy vanilla homemade marshmallows that will make your holiday hot cocoa even better than it can be with store-bought marshmallows!
Why Homemade?
Y’all, is it just me that feels like everyone and everything is trying to poison us these days? No? Well, I’m glad I’m not alone in this. I mean, have you looked at the ingredient list of common foods these days (let alone the skincare products people are slathering on their bodies)? They’re terrible, and the sad thing is that most folks don’t know what half of the ingredients are, what their purpose is, or what they’re doing to our bodies. What happened to simple ingredients that nourished us, especially where food is concerned? Ugh… that dang shelf-life!
Okay, so most store-bought marshmallows contain sugar, corn syrup, gelatin, and corn starch. It seems like a simple ingredient list, but the quality of the ingredients is where the negative health effects come into play. Most of these ingredients are genetically modified (GMO), such as sugar, corn syrup, and corn starch. Corn syrup is not a natural food and is very high in sugar. Gelatin is an animal product sourced from pigs or cows, so if the animal isn’t healthy, neither is the gelatin. ? Lastly, while sugar is necessary for energy and proper body function, too much will negatively impact your health, especially if sourced from overly processed, low-quality ingredients.
Healthy homemade marshmallows, on the other hand, made with non-processed, non-GMO ingredients from high-quality sources, will provide you with a sweet treat that isn’t void of nutrition, more gentle on your blood sugar, and tastes even better than the low-quality store varieties that are mainly there for convenience sake.
Okay, before I get into the ingredients for these healthy homemade marshmallows, let me first share some special equipment you’ll want to have on hand to make this process easy and fail-proof.
Equipment You’ll Need
While homemade marshmallows have been around for a long time and can be made with basic kitchen gadgets, it is helpful to have some items to ensure your homemade marshmallows turn out great the first time you make them! (No wasted ingredients here!)
- Stand mixer – I use a KitchenAid stand mixer, and I love it. It was a gift that is regularly used here in my home. If you don’t have a stand mixer, I’m sure you can also use a hand mixer, or if you really want to go old school, a whisk, but be prepared to whisk for quite a while!
- Digital candy thermometer – While some people who are experienced confectionaries can detect the perfect temperature of a mixture by how it smells, is colored, or is bubbling — I am not that person. This means that having a digital candy thermometer to know when my honey mixture is at the correct temperature is of utmost importance. I mean, I don’t want to waste all my time and money only to have my marshmallows not set up properly because I didn’t get the sugars to the right temperature.
- Parchment paper and arrowroot powder – You will need something to pour your homemade marshmallows in so they can set up, but marshmallows are STICKY, so having parchment paper coated in plenty of arrowroot powder is a great way to keep the marshmallows from sticking to your pan and each other.
Okay, now let’s dive into the recipe.
Vanilla Healthy Homemade Marshmallows
This recipe takes two days of your time, so keep that in mind when preparing to make these healthy homemade marshmallows. The first day will take you less than 30 minutes to make them, then they have to sit overnight to set up, and the second day will take about 30 minutes to cut them (depending on how large or small you want them sized).
Ingredients:
- 1 cup water, divided
- 3 tbsp grass-fed gelatin (use code “GROWINGUP10” to get an extra 10% off )
- 1 cup honey
- 1/2 tsp salt
- 1 tsp vanilla bean paste (or more to taste)
- 1 tbsp marshmallow (Althaea officinalis) root powder
- 1/2 cup arrowroot (Maranta arundinacea) powder
Directions:
- Begin by adding 1/2 cup of water to the bowl of your stand mixer. Sprinkle grass-fed gelatin over the top and let it sit and “bloom” for 10 minutes.
- While gelatin is blooming, add the second 1/2 cup of water along with the honey, salt, and vanilla bean paste into a small saucepan, mix it well, and heat it to 230-240 degrees F, not stirring the mixture once it begins to boil. It will take between 10-15 minutes to come to temperature, and a digital thermometer is very useful here to help you keep an eye on the temperature. It’s also very helpful to toggle the heat between medium to medium-high to get the mixture to this temperature.
- When the honey mixture reaches temperature, remove it from the heat. Attach the whisk attachment to your stand mixer and turn it on low to mix the gelatin while slowly adding the honey mixture. Once all the honey is in, turn the speed to high and let it whip the mix for 6-8 minutes until it looks like thick marshmallow fluff. At this point, add the marshmallow root powder and continue to whip for 1-2 minutes more.
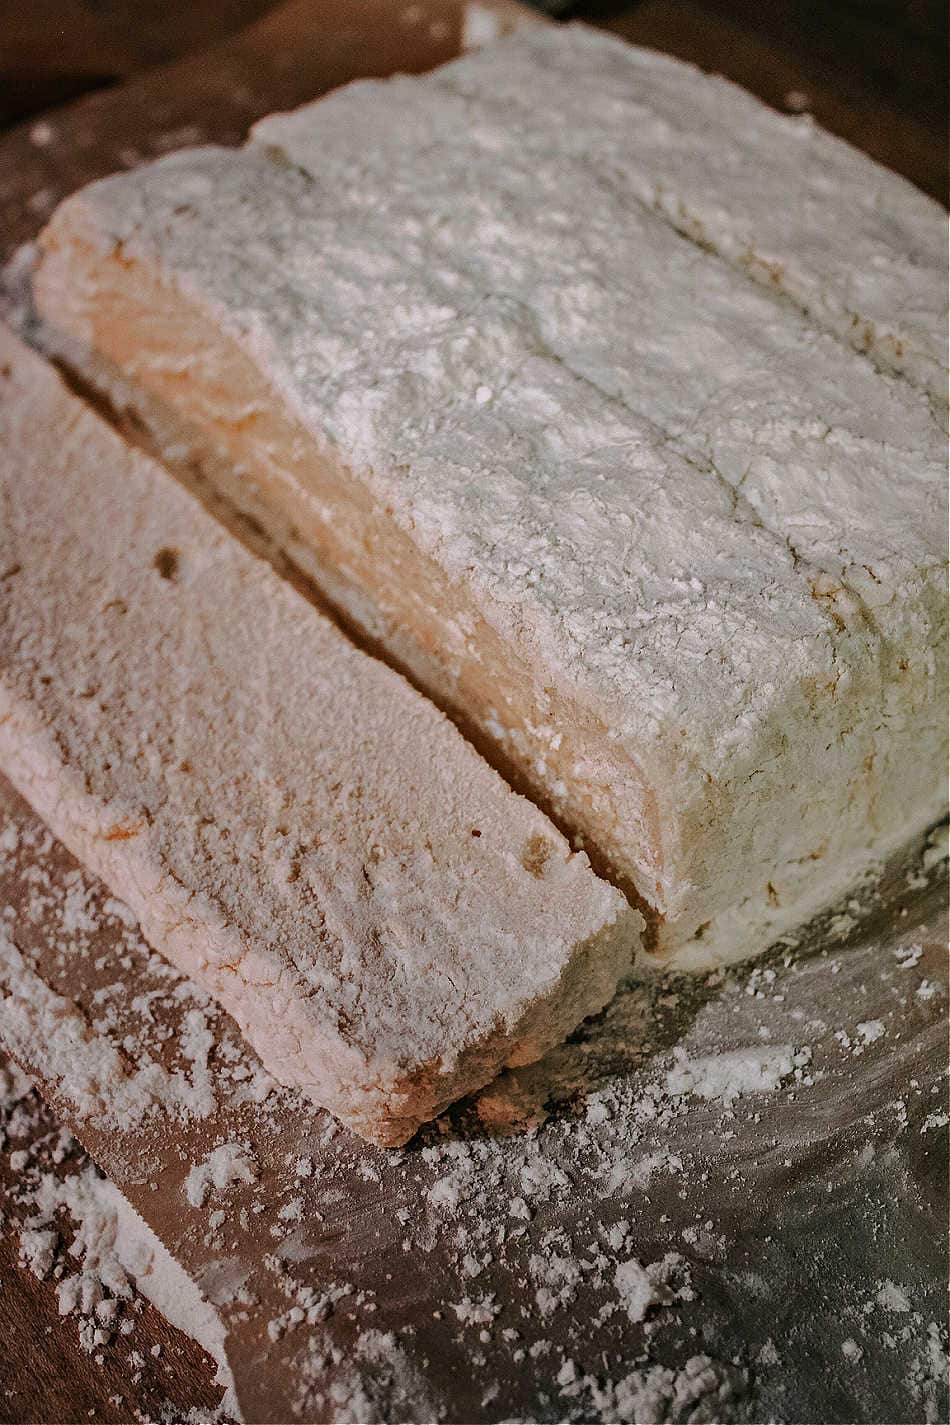
- While your marshmallow mixture is being whipped in the stand mixture, prepare the pan that your marshmallow mixture will be transferred into. For large, thick marshmallows (like those used for smores), a 9×9 dish will work best. A large baking sheet or two will work for smaller marshmallows (like those for hot chocolate or sweet potato casserole). Cover the dish with parchment paper, including the sides if possible, and dust with 1/4 cup of arrowroot powder.
- When the marshmallow fluff is ready, quickly transfer it to the dish, spreading it evenly and smoothing the top with a spatula. Add the remaining 1/4 cup of arrowroot powder to the top of the mixture and gently place another piece of parchment paper over the top. Move the dish to a location where it will not be disturbed and let it set overnight to firm up.
- The next day, lift the set marshmallows out of the dish by picking up the edges of the parchment paper or by carefully setting a large cutting board over the top of the dish and flipping the whole thing over onto the cutting board. Carefully remove the parchment paper and use a sharp knife to cut the marshmallows into squares. It can be helpful to warm the knife under hot water, wiping it free of water, in between slices.
- You can enjoy the marshmallows immediately, or you can sprinkle them with extra arrowroot powder to keep them from sticking together before placing them in a storage container and keeping them in the refrigerator for 1-2 weeks.
And that’s it! I know it looks like a lot of work, but it’s really not. Once you make a batch, you’ll realize just how easy it is.
Enjoy, friends! If you give this recipe a try, I’d love to know what your thoughts are!
Love and light,
Meagan