


When we moved off the mountain and down into this valley four years ago, we finally had a chance to create the garden of our dreams. I envisioned an in-ground market garden where we would grow crops that thrive in rows, a series of raised bed gardens where we could maximize space and better manage weeds, and finally a greenhouse where I would start seeds and overwinter tender plants.
In year one, we installed the market garden, and it has been our primary garden up to this point. This year, we’re installing the raised bed gardens, and I’m guessing it will take a full year to really get them going the way I intend. Then there’s the greenhouse — the final part of the plan. Seeing how it will be the most expensive part, I’m guessing it will be a couple more years until we get that project underway.
The Beds
Deciding on which types of beds to go with was one of the longest parts of this process. There are so many — some cheap, some expensive, some pretty, some super basic, some non-toxic, some quite toxic — to choose from, so we took our time and researched a lot of different options.
For me, pretty and non-toxic were priorities. I also didn’t want to have to rebuild the beds every 3-5 years, so we knew we were going to have to spend more money to create beds that would last 10+ years.
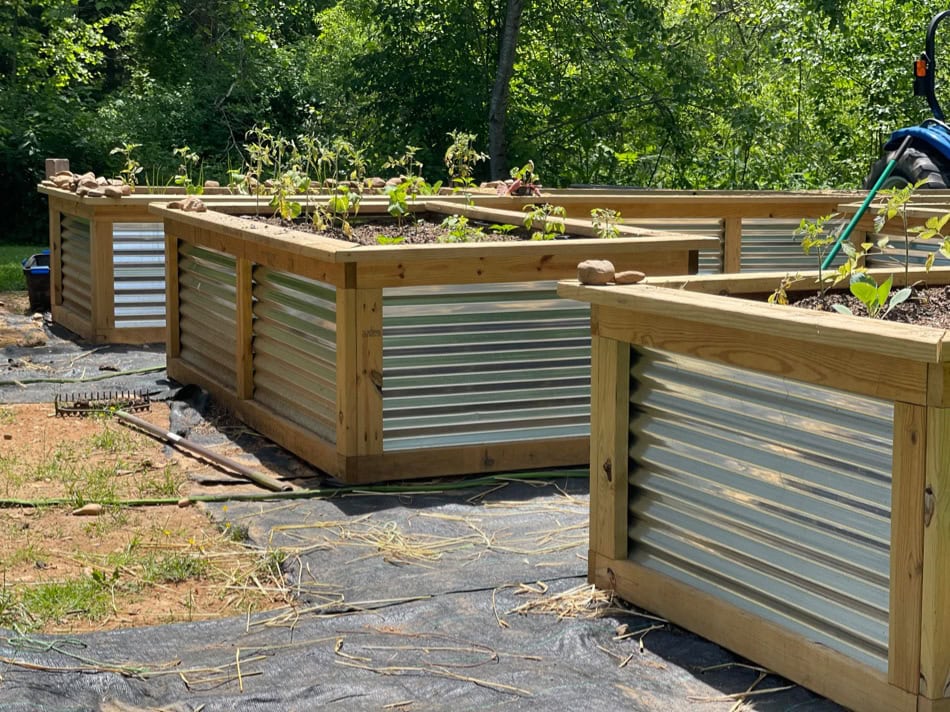
In the end, we decide to go with treated lumber frames with galvanized tin screwed to the inside. Galvanized tin is coated in zinc oxide to prevent rust, making it non-toxic and safe for organic raised-bed gardening. Since it covers the treated lumber, the soil won’t come into contact with the lumber, thus, keeping lumber toxins out of our food while allowing the wood to hold up for years.
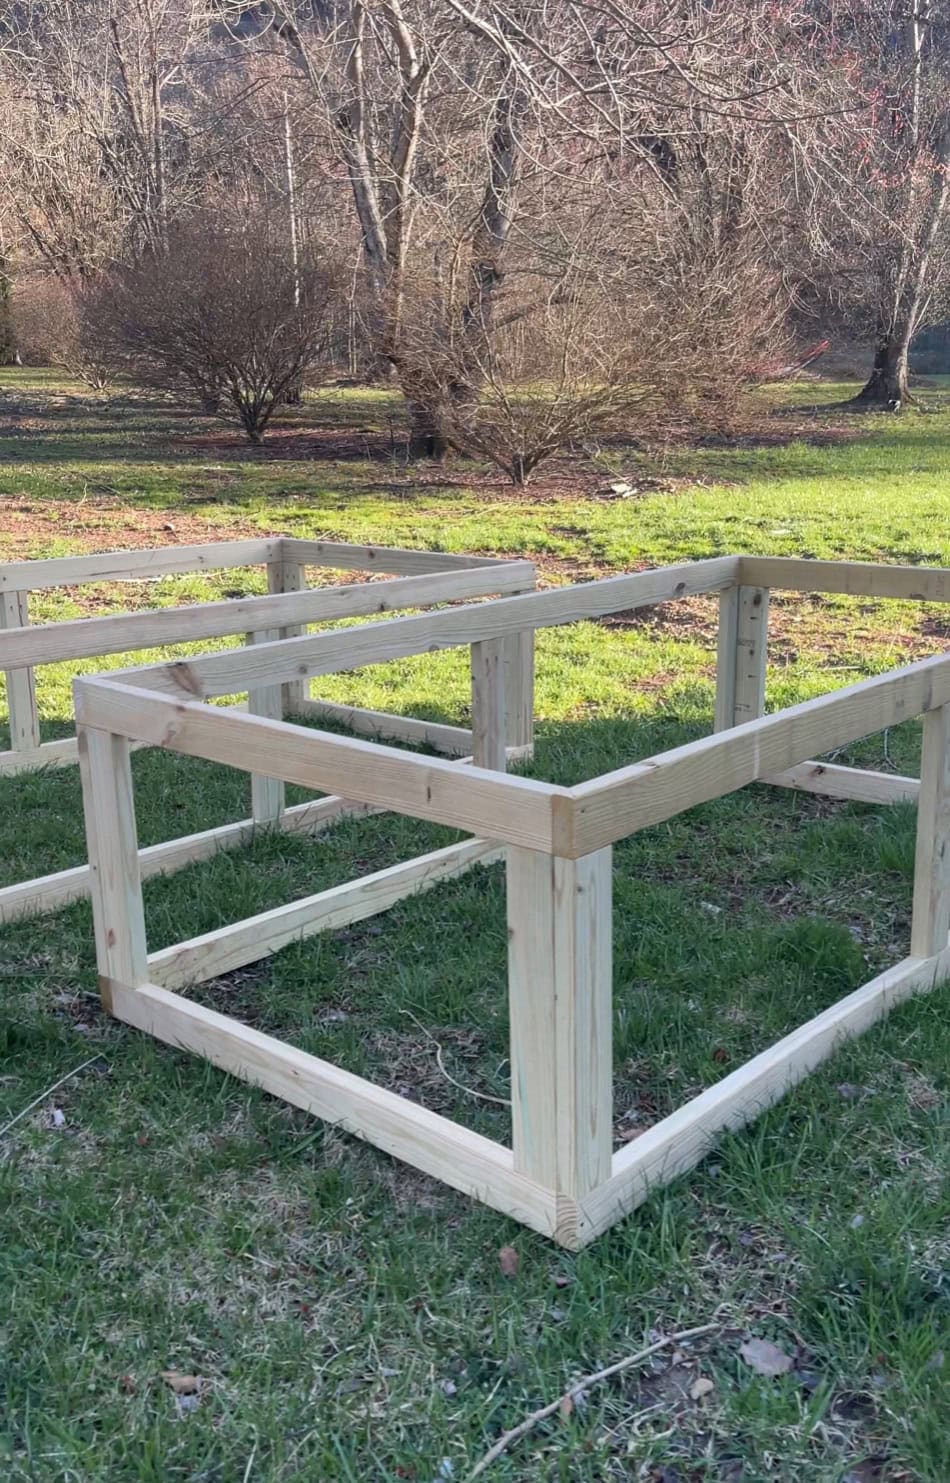
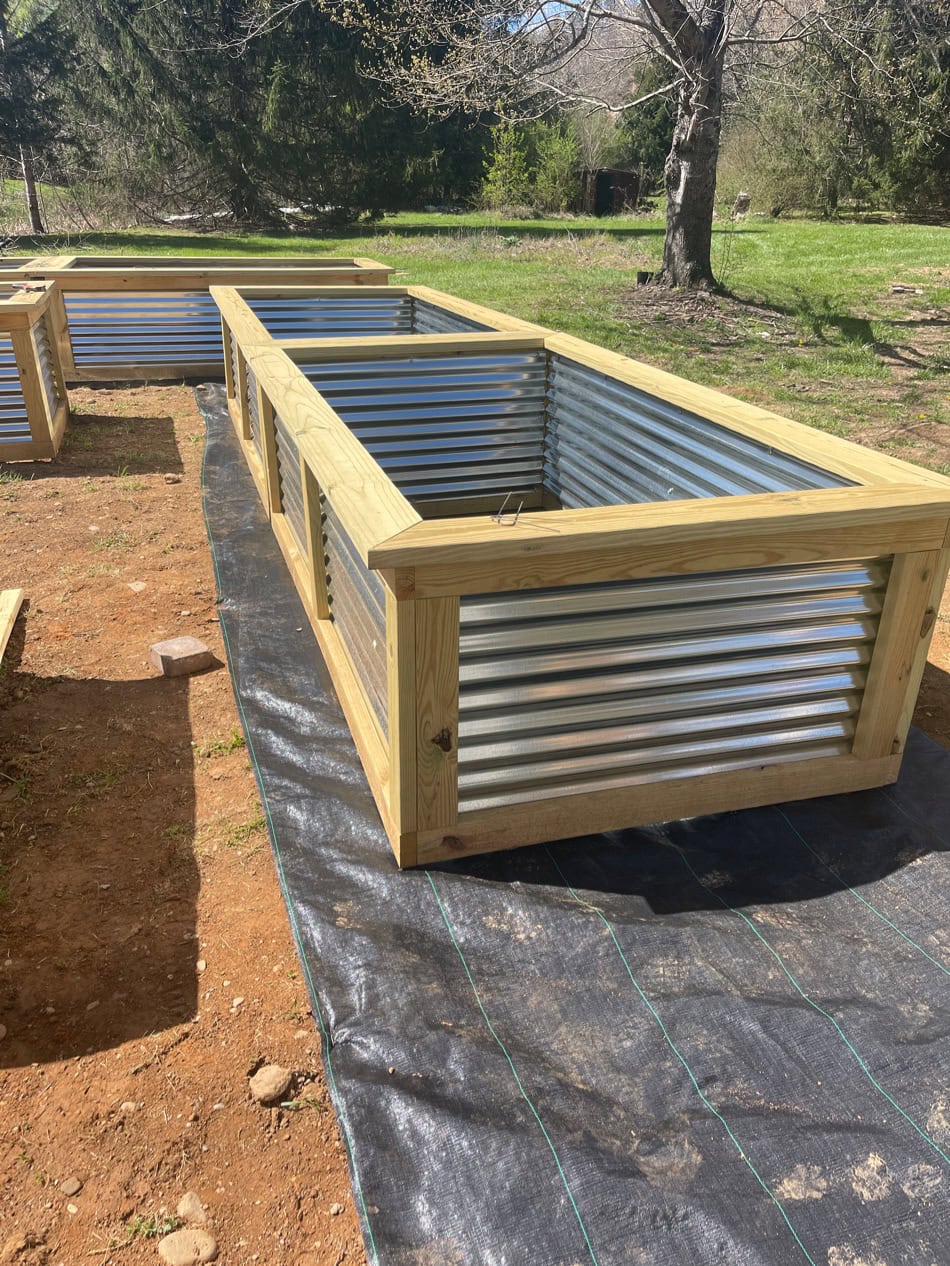
Dean and the boys built our beds to be 8 ft long x 4 ft wide x 4 ft tall. We chose this size so we’d have plenty of space for our plants and so we didn’t have to bend over when working in the beds. I’ll eventually take time to stain the raw wood to make it a darker color, but for now, they’re all-natural.
Now, you might be wondering what kind of soil we used to fill all the beds with, and the answer is that we didn’t use any soil at all.
The Soil
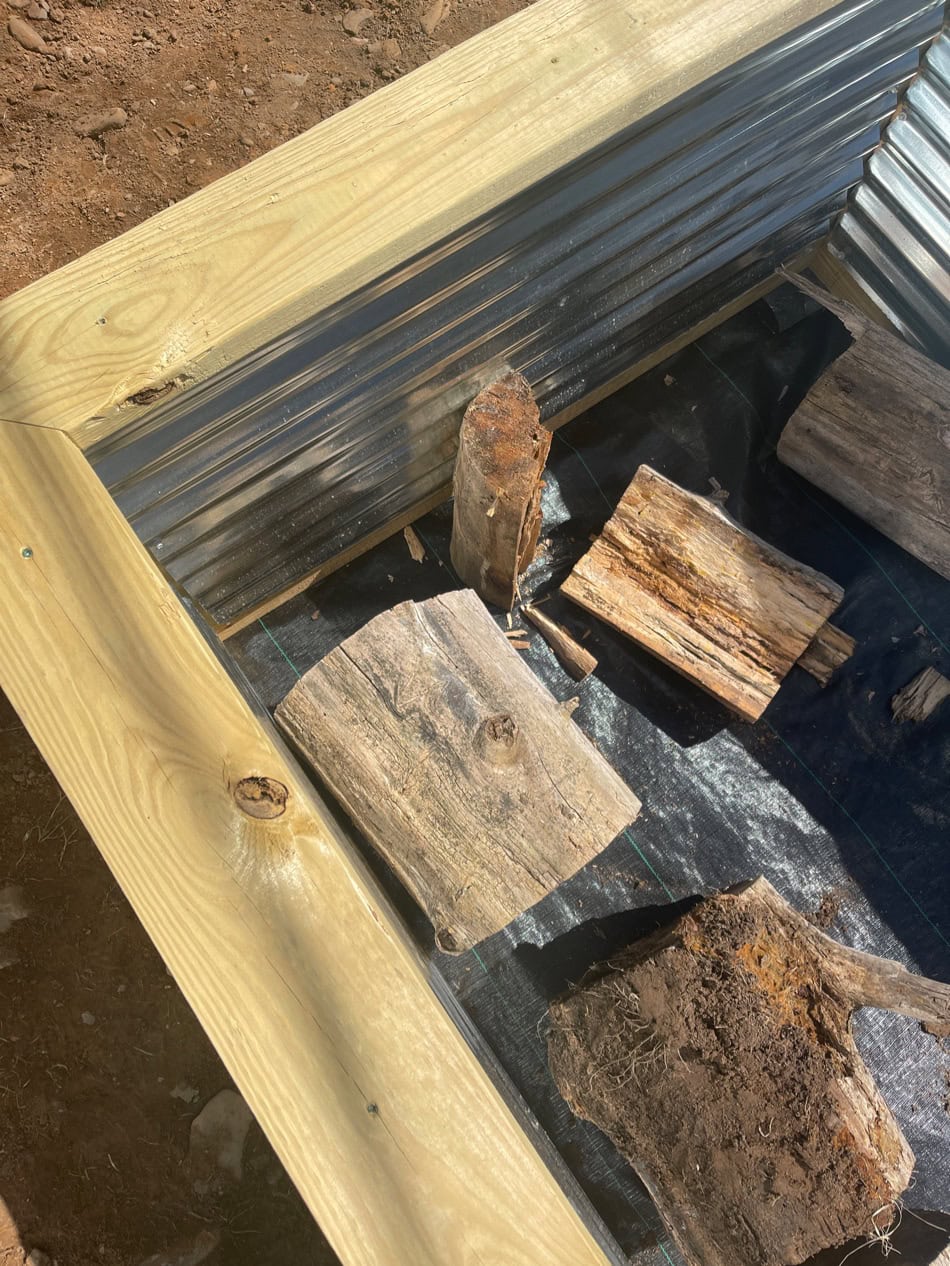
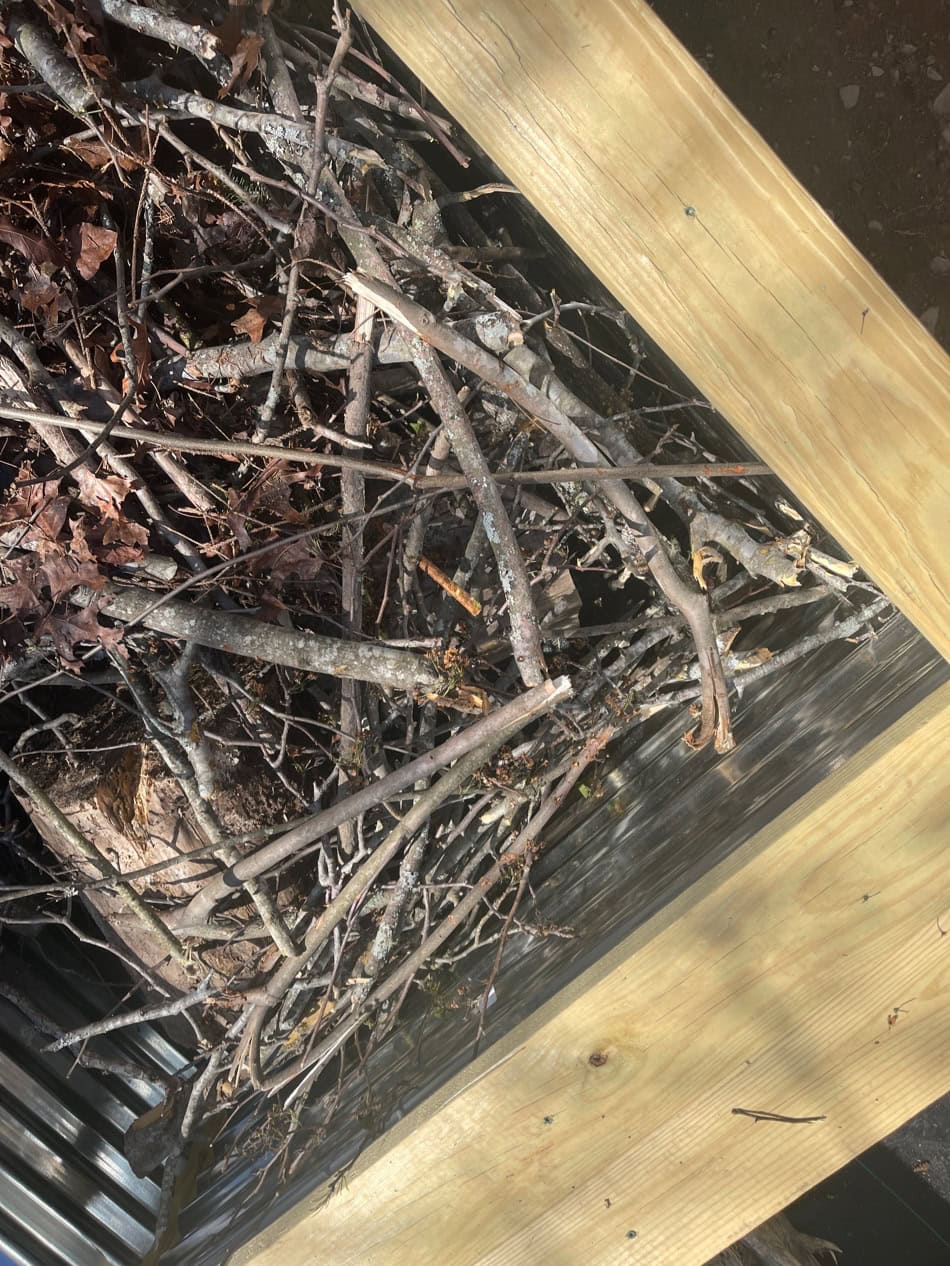
We filled our beds following the Hügelkultur method, which is an old gardening method used in Europe and Germany that utilizes rotten logs and plant debris to build up the beds instead of soil. It’s sort of like creating layers (large plant material to small plant material) that eventually breaks down into compost that you can plant in.
Because we have a lot of dead trees on our property that break or fall over with every wind storm, we had a lot of wood to use in the beds.
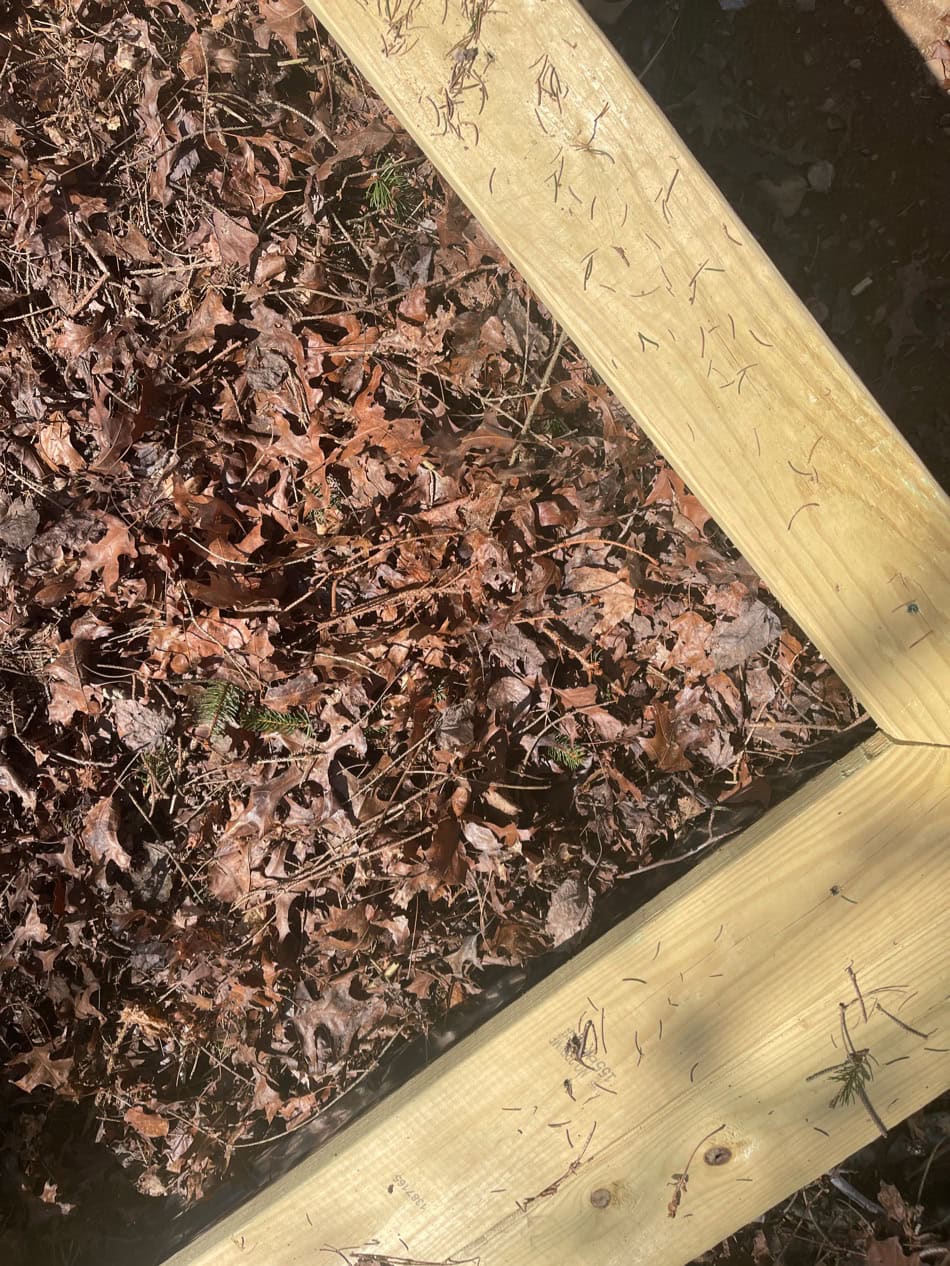
We started by filling the bottoms of each raised-bed with large logs, and we filled in small gaps with smaller logs. Next, we pilled twigs, branches, and brush on top of the logs and covered that with small plant material, such as pine needles and leaves, old wood chips, and straw, to further fill in the gaps. I would say our beds are 3 ft full of this type of material.
For the last foot of space, we bought vegetable-based compost from a local landscape company and topped each bed with that. This was a bit of an expense as well, but we new it would be, so no surprises there. Once the beds were filled, Uriah tossed a few hundred red wriggler worms into each bed for good measure as well.
We should have plenty of space on top of the wood for this year’s plants to grow in. Over the years, the wood in the bottom of the beds will break down and turn into high-quality compost, but we’ll definitely have to keep putting new compost on the tops of the beds each year as things settle and the wood material below breaks down.
The Layout
The nine beds are laid out horizontally and vertically in three rows in a 24 ft x 24 ft square. There are openings for gates that will eventually be put in, and there are four arches connecting beds where climbing plants will be planted. There is even some extra space in the center of the garden for a table or perhaps a statue or bench.
We also have plans to build a small bed that is closer to the ground next to our house where we’ll grow the majority of our lettuce, but we haven’t started on it quite yet.
The Pathways
Where pathways were concerned, we had a lot of different options, but we chose to go with stone paths in the end. We made sure there beds were at least 4 ft wide, but I’m thinking they’re closer to 5 ft because I wanted to be able to get a wheel barrow or garden cart easily through the space.
To make the paths, Dean first scraped all the grass away from the space where we were putting the raised bed gardens with his tractor bucket. Next, we rolled out a weed barrier, stapled it down, and placed all the empty garden beds on top. From there, we leveled the beds and filled them.
The next step in the process is to bring in some sort of stone to fill the paths between the beds, but just what kind of stone, I’m not sure yet. Maybe gravel, larger sized pea gravel or small pea gravel — we haven’t priced it yet, but I know I definitely want stone. I also need to decide on some sort of border that will surround the entire garden and keep the stone out of the grass (and the grass from creeping into the stone!), so this is where my focus is at the moment.
The Plants
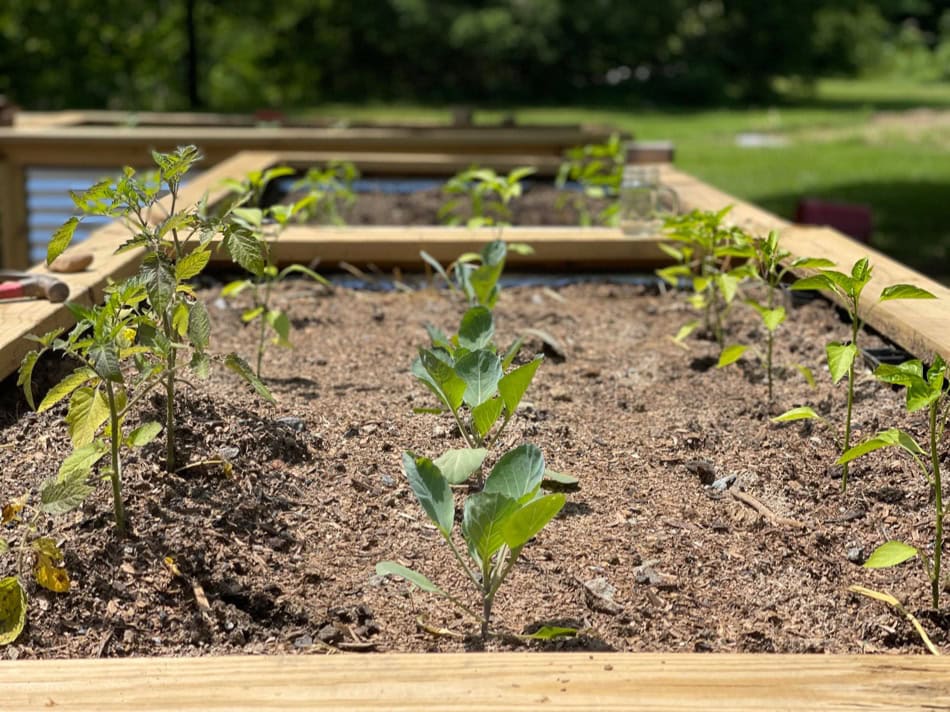
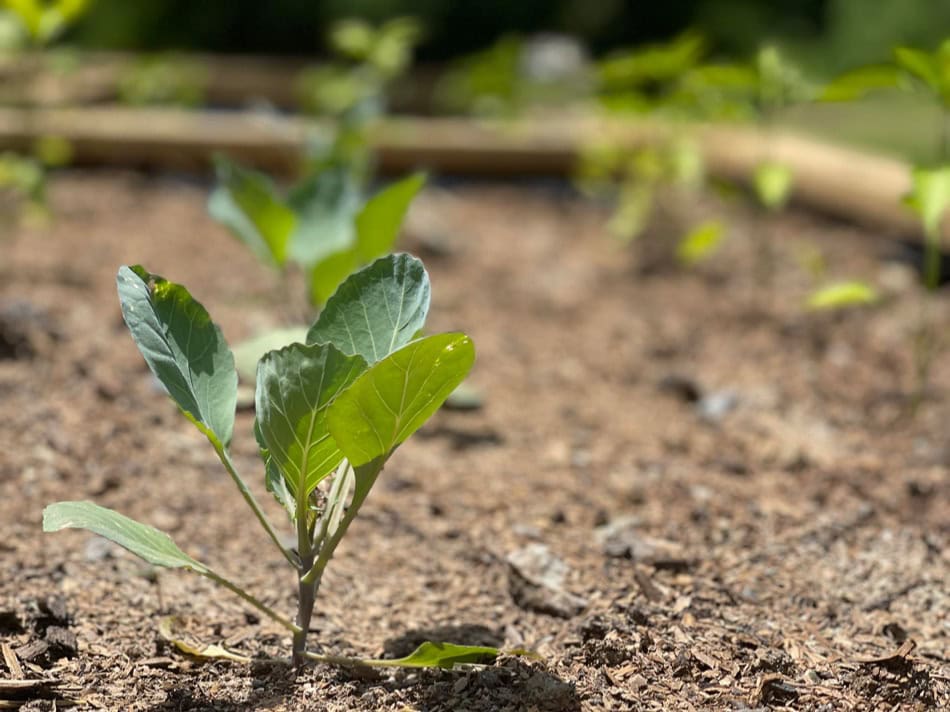
This year, we purchased the same types of plants we always grow — tomatoes, sweet and hot peppers, onions, zucchini, cucumbers, watermelon, peas, etc. I did buy some new plants like cabbage and rhubarb, neither of which I’ve grown before.
The plan is to plant things we’re mostly familiar growing so we can get adjusted to growing things in raised bed gardens. We put everything that likes sun in the beds that get more sun and everything that prefers less sun in the shadier beds, and we’ll see how it goes.
Next year, we’ll likely plant a bit more. I have dreams of growing all the things, but I know it’s important to pace myself until I get used to this new way of growing things.
We also have our market garden (an in-ground garden that’s planted in market style rows) where we are growing potatoes, corn, pole beans, and pumpkins too, so we’ll have plenty to keep us busy throughout the season.
Alright, friend! That’s it for this little project update. I hope you’ve enjoyed getting a glimpse into this project and hearing all the details. If you have any questions, feel free to hit reply and ask away, and if not, then I’ll talk to you soon!
Love and light,
Meagan